Using the Pocket Internet Privacy Shield

In my previous post, I described how to install a Pocket Internet Privacy Shield. It uses a cheap TP-Link pocket router, OpenWRT and a privacy VPN to protect your privacy on untrusted networks like hotels and coffee shops.
I had no idea the post would be as long as it was. I didn’t want people to have to scroll to the bottom just to read how to use the thing. So here’s the post on how to use the thing.
About the Device
Here’s the basics of the device. It has:
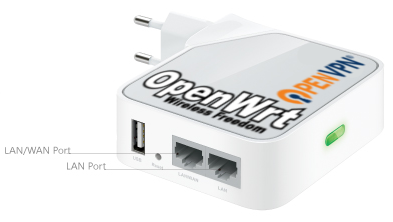
- A LAN/WAN wired network jack that can be connected to an untrusted wired network
- A LAN wired network jack that you can plug your computer into
- An untrusted wireless network that can be connected to untrusted wireless networks, like a hotel or coffee shop
- A trusted internal wireless network that you can connect your devices to securely
- A LED that blinks in different patterns to show the state of the device
- A tiny reset button re-purposed to connect and disconnect the VPN
So you can use any combination of wired or wireless networking on both the untrusted network and your internal trusted networks. So you’ll have to pick out the scenario you’d like to use.
Conventions
During the install, look for this type of formatting in text.
Italics: Something you look for on the screen or device
Bold: Something you type, click or select
Using an Untrusted Wired Network
This is the easiest to use and is preferred when it’s available.
- Connect the untrusted wired network into the LAN/WAN network jack
- Connect your device to either:
- The LAN network jack for a wired connection
- The internal wireless network set up during the install
- Plug the device into a power outlet
- The device should blink while it’s loading, then go into its’ slow
blink mode, once every 5 seconds or so.
At this point, you are protected by the firewall but your communications aren’t private yet. Go down to the Connect to the VPN section. If you know that you don’t have to deal with a captive portal, you can connect to the vpn before you connect your devices for a bit more privacy.
Using an Untrusted Wireless Network
You’re using the device to connect to the untrusted wireless network, so your devices don’t have to. This requires going into the device’s management webpage.
If you’ve connected to this untrusted wireless before, the device will remember the settings and automatically connect again. You can skip these instructions and just connect your laptop or other devices.
- If you’re connecting your laptop or other device to the wired
connection, plug the cable into the LAN network jack. - Plug the device into a power outlet
- The device should blink while it’s loading, then go into its’ slow
blink mode, once every 5 seconds or so - If you’re connecting your laptop or other device to the wireless
network, go ahead and connect - Open a browser and navigate to http://192.168.1.1/
- From the web management menu , select Network -> Wifi
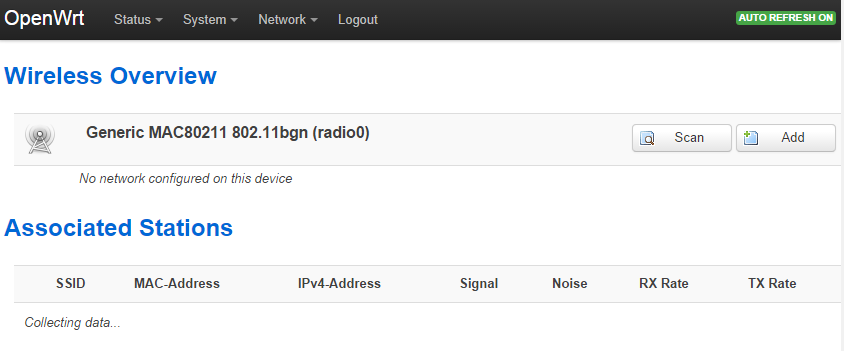
- Beside Generic MAC80211 802.11bgn (radio0), click the Scan button
- Find the network you want to connect to and click the Join Network button
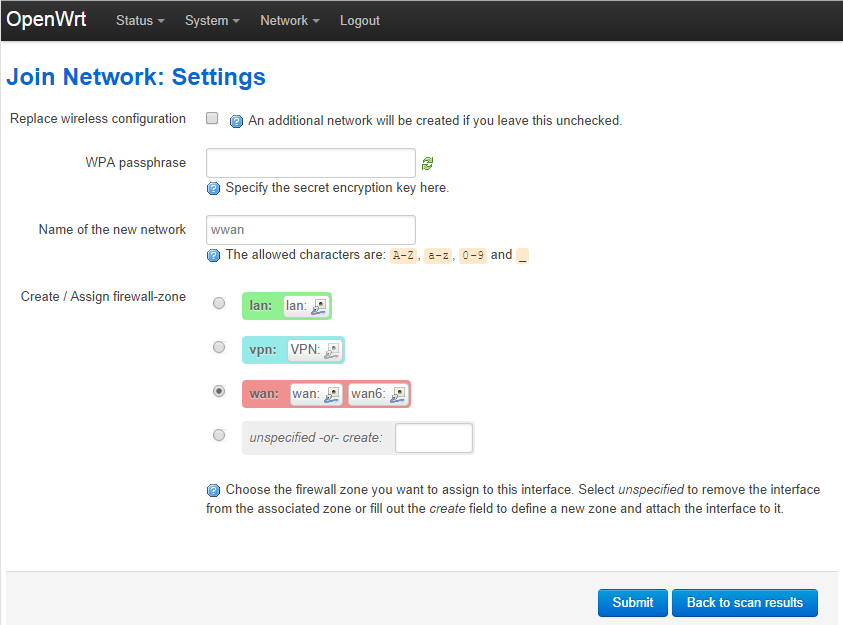
- UNCHECK the Replace wireless configuration box
- Enter a password if needed to connect
- Make sure the Name of the new network is wwan
- Make sure the Create / Assign firewall-zone is wan
- Click the Submit button
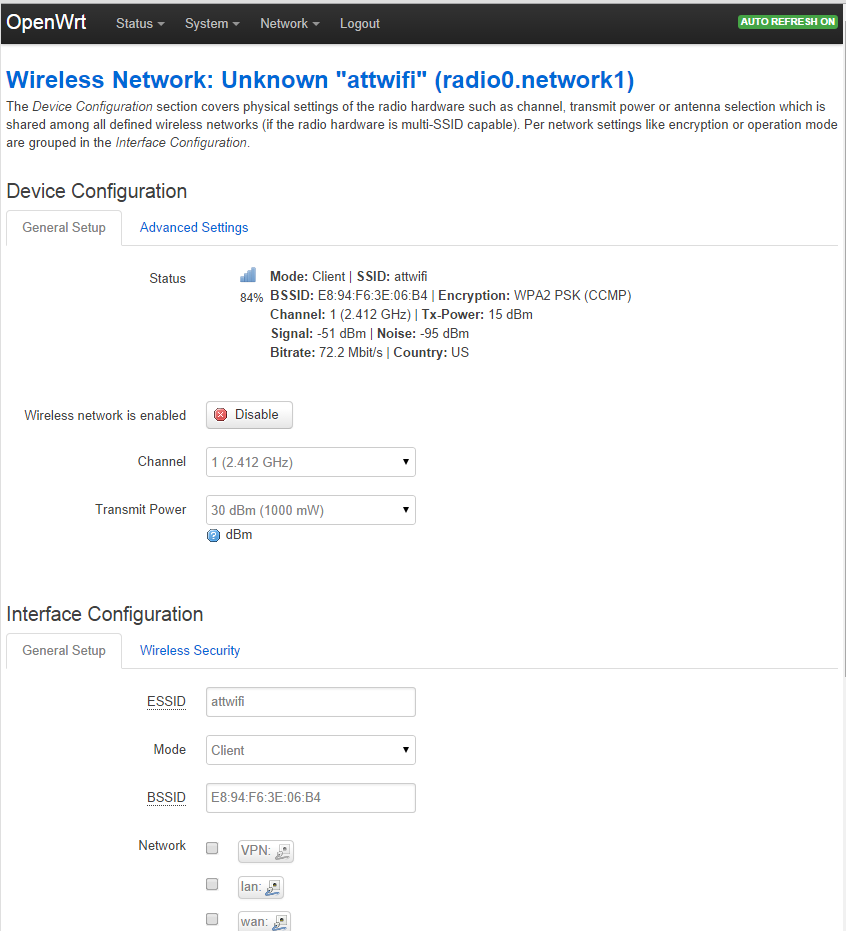
- In the next Wireless Network page, click the Save & Apply button

Wireless overview page

Selecting wireless network

Join network: settings page

Wireless configuration settings
At this point, you are protected by the firewall but your communications aren’t private yet. Go down to the Connect to the VPN section.
Connect to the VPN
By default, the vpn does not start automatically, so you’re communications aren’t private. Hotels typically use a captive portal that you have to browse to in your web browser so you can login and/or agree to whatever lousy policies they have. Only then do you get full Internet access.
At this point, the device should be doing a slow blink, once every 5 seconds or so.
- Open a web browser and see you need to click through a captive
portal. Make sure basic Internet works (it redirects you to some new
page, etc). - Find a paperclip
- Find the Reset button. It’s between the LAN/WAN port and the USB port
- Push the Reset button (for less than a second). You should hear/feel it click.
- After a couple of seconds, the LED should start a fast blink cycle (about once a second)
- To test, open an web browser and go to a geolocation website like
http://www.iplocation.net/ . It should show a location different
than the one you’re at.
At this point you are protected by the firewall and all communications are encrypted by the VPN. People on the untrusted network should not be able to see where you’re going or what you’re doing.
Disconnecting from the VPN
If you need to disconnect from the VPN, it’s pretty simple.
- Find a paperclip
- Find the Reset button. It’s between the LAN/WAN port and the USB port
- Push the Reset button for about 3 seconds. You should hear/feel it click.
- The LED should immediately go into slow blink mode, about once every 5 seconds
At this point, you are protected by the firewall but your communications aren’t private.
Turning the Device Off
Unplug it. Enough said.
Resetting the Device
If you want to reset the device in a nicer way than unplugging it, here
how.
- Find a paperclip
- Find the Reset button. It’s between the LAN/WAN port and the USB port
- Push the Reset button for between 10 and 20 seconds. You should hear/feel it click.
- The device should start blinking as it’s loading, then go into the slow blink mode.
Wiping the Device
If you every need to erase all your settings (before selling or getting rid of the device), this will wipe all configuration and reset the device back to a default OpenWRT install.
- Find a paperclip
- Find the Reset button. It’s between the LAN/WAN port and the USB port
- Push the Reset button for longer than 20 seconds. You should hear/feel it click.
- The LED start blinking as it’s loading
At this point, the device is not configured in any way.